The Babel.Obfuscator NuGet package is handy when it comes to configure obfuscation on build servers like DevOps and AppVeyor. In this article we will show how to setup Babel Obfuscator on AppVeyor using the Babel.Obfuscator NuGet package. This package is distributed with the Babel Obfuscator Company license and is not available to download form NuGet.
Prerequisites
The following files are required to integrate Babel Obfuscator in AppVeyor:
- Babel.Obfuscator.nupkg NuGet package file·
- Babel Obfuscator Company License file babel.licenses
Upload Babel Obfuscator on AppVeyor Account Feed
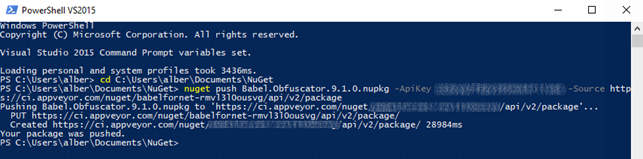
Login to AppVeyor and from Account Settings > NuGet, copy the command line used to upload NuGet package files. Open a PowerShell command prompt and enter the publish package command:
nuget push Babel.Obfuscator.9.1.0.nupkg -ApiKey <your api key> -Source https://ci.appveyor.com/nuget/<appveyor account feed>/api/v2/package
Setup AppVeyor NuGet Package Source in Visual Studio
Open Visual Studio and in the Tools > Options dialog search for NuGet. Select Package Source and add the AppVeyor Account feed as follow:
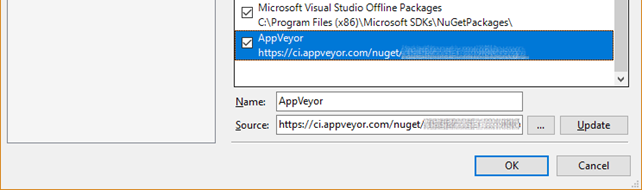
Accept changes by pressing the OK button.
Adding Reference to Babel Obfuscator NuGet
In Visual Studio open your project and add the Babel.Obfuscator NuGet package by selecting the configured AppVeyor source already configured.
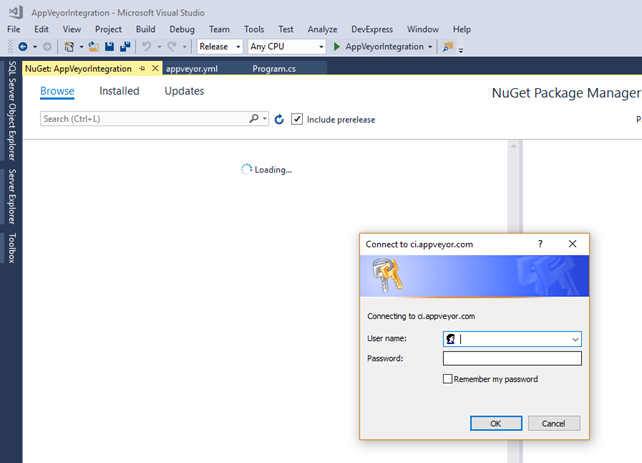
The first time you connect to AppVeyor Account feed, a popup will ask to enter your AppVeyor user name and password. Enter the credential used to login your AppVeyor account.
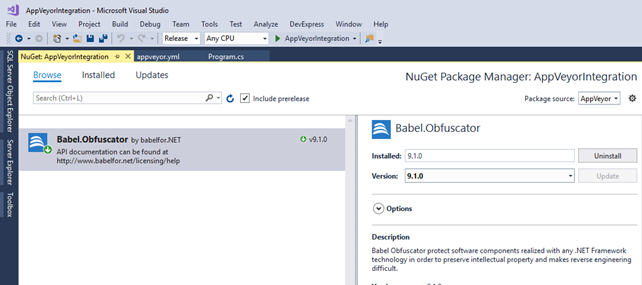
Install Babel.Obfuscator NuGet package by pressing the Install button. When you reference Babel.Obfuscator package the Babel MSBuild task is injected in your project file just before the AfterBuild task to obfuscate the target assembly.
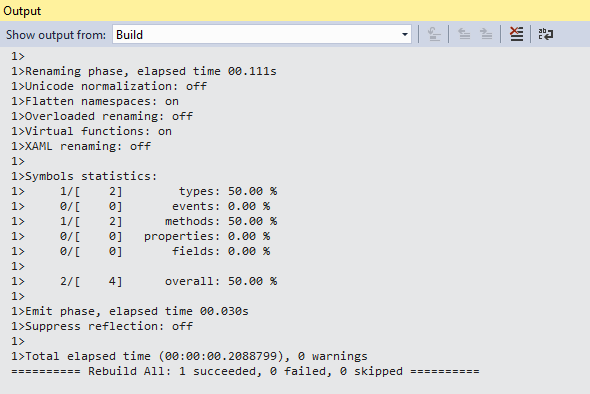
After installing Babel.Obfuscator you can rebuild your project to see the obfuscation running in the Output window.
Deploying Babel Obfuscator on AppVeyor
Now that the obfuscation run locally on your Visual Studio
project, you need to deploy in AppVeyor.
Upload the solution on GitHub (or the Source Control System you have
configured in AppVeyor).

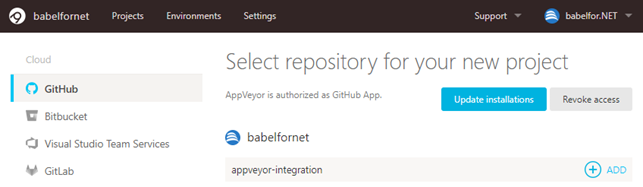
Login at https://ci.appveyor.com and create a NEW PROJECT by selecting the GitHub repository you have created for your project.
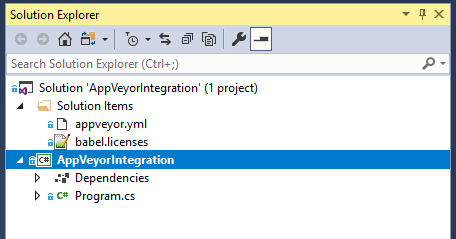
Now use Visual Studio to create inside the solution folder a file called
appveyor.yml
Note that the solution folder must be the root folder of your GitHub repository to let AppVeyor to use your build configuration instead of the configuration edited in the AppVeyor UI
Then add your babel.licenses license file in the same folder.
The appveyor.yml configures AppVeyor build pipeline and substitute the configuration edited in AppVeyor UI. The appveyor.yml file content for the example project here represented, is the following:
version: '1.0.{build}'
image: Visual Studio 2017
branches:
  only:
  - master

init:
  # Good practise, because Windows line endings are different from Unix/Linux ones
  - cmd: git config --global core.autocrlf true

# build Configuration, i.e. Debug, Release, etc.
configuration:
  - Release

before_build:
  # Display .NET Core version
  - cmd: dotnet --version

  # Add private AppVeyor feed source
  - cmd: nuget sources add -Name AppVeyor -Source https://ci.appveyor.com/nuget/babelfornet-kwtc6g3uiwze -UserName xxxxxxxxxxxxxx -Password xxxxxxxxxxxxxx
  # Display minimal restore text
  - cmd: nuget restore ./AppVeyorIntegration/AppVeyorIntegration.sln

build:
  verbosity: minimal

artifacts:
  - path: ./AppVeyorIntegration/AppVeyorIntegration/bin/$(configuration)/netcoreapp2.1
    name: Build_$(configuration)_$(appveyor_build_version)
    type: zip
The relevant parts are:
image: Visual Studio 2017
The image property set which system image to use to build your project. As we use to build our application in Visual Studio 2017, you should pick the Visual Studio 2017 image.
  # Add private AppVeyor feed source
  - cmd: nuget sources add -Name AppVeyor -Source https://ci.appveyor.com/nuget/babelfornet-kwtc6g3uiwze -UserName xxxxxxxxxxxxxx -Password xxxxxxxxxxxxxx
  # Display minimal restore text
  - cmd: nuget restore ./AppVeyorIntegration/AppVeyorIntegration.sln
Setup NuGet source to add your AppVeyor Account feed. This command ensures AppVeyor can find the Babel.Obfuscator NuGet package we uploaded in AppVeyor Account feed.
Then we restore all packages referenced inside the Visual Studio solution.
build:
  verbosity: minimal
The build command that starts the build on AppVeyor.
artifacts:
- path: ./AppVeyorIntegration/AppVeyorIntegration/bin/$(configuration)/netcoreapp2.1
name: Build_$(configuration)_$(appveyor_build_version)
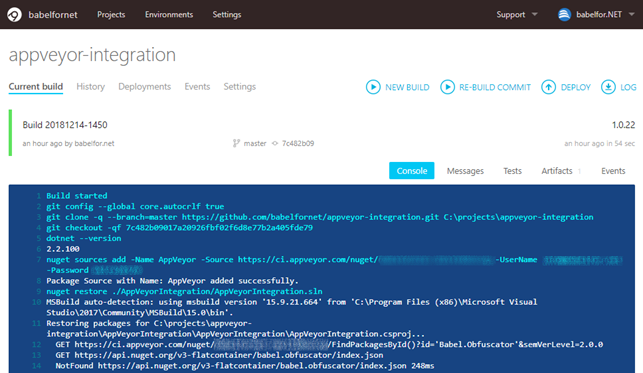
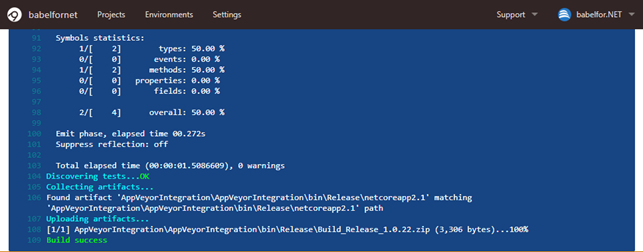
type: zipThis command tells AppVeyor that we want to take everything from the build directory, create a zip file called Build_$(configuration)_$(appveyor_build_version) and upload it to AppVeyor’s cloud storage. Ensure to update the path command with the relative path of your project file. We’re ready to commit the yml file to GitHub source control. When we push our changes to GitHub, AppVeyor starts a new build presenting the build output inside the Console. A green bar indicates that a build action has completed.
The Artifacts tab displays a list of the artifacts that were created as part of the build action.
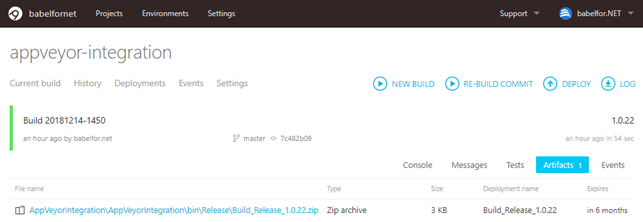
By clicking the name of the artifact, the zip file containing the obfuscated assembly will be downloaded.
Conclusion
We have seen how to integrate Babel Obfuscator in AppVeyor continuous integration build using the Babel.Obfuscator NuGet package tool. By referencing Babel.Obfuscator tool package, Babel is injected in the project file to obfuscate the target assembly. The obfuscated assemblies are collected in a zip file downloadable through the Artifacts page.