DevOps is the new build automation cloud-based platform provided by Microsoft. Babel Obfuscator can be plugged in your DevOps build pipeline by referencing in your Visual Studio project the Babel.Obfuscator NuGet package.
In this tutorial, we will start from scratch using GitHub as our source repository. We will connect the GitHub repository to DevOps and setup Babel Obfuscator to run on every DevOps build. If you are already familiar with GitHub and DevOps you can skip the following paragraph and start reading from the “Add Babel Obfuscator to DevOps Build” paragraph.
Link your GitHub Repository to DevOps
The test project will be a simple C# .NET 4.5 WPF application (WpfLicense) that generates and validate a license file. With this example, we will show how to obfuscate the application and generate a license using the Babel Licensing generation tool directly on DevOps.
Let’s start by uploading the source files to GitHub.
First, create the application private repository on GitHub. If you have not already set up git for your project, CD into the application solution folder and enter the following commands:
git init
git remote add origin REMOTE REPOSITORY URL
git pull origin master
Add all the existing files to the repository:
git add .
git commit -m "WpfLicense source files"
git push origin master
Create the azure-pipeline.yml YAML configuration file inside the solution folder. This file will be used by DevOps to configure the build. Open the azure-pipelines.yml file in the Visual Studio editor and add the following instructions:
trigger:
- master

pool:
  vmImage: 'windows-latest'

variables:
  solution: '**/*.sln'
  buildPlatform: 'Any CPU'
  buildConfiguration: 'Release'

steps:
- task: NuGetToolInstaller@1

- task: NuGetCommand@2
  inputs:
    restoreSolution: '$(solution)'
    feedsToUse: 'select'
    includeNuGetOrg: true

- task: VSBuild@1
  inputs:
    solution: '$(solution)'
    platform: '$(buildPlatform)'
    configuration: '$(buildConfiguration)'

- publish: $(Build.ArtifactStagingDirectory)
  artifact: WpfLicense
As we will run Visual Studio on DevOps build, we need to start the build on a Windows virtual machine. If you are developing a .NET Core application, you might want to run your build on Linux or a MAC virtual machine. Babel Obfuscator supports every build system based on .NET Core 3 included Linux and MAC OSX DevOps virtual machines.
If you need to host your build on a Linux or MAC OSX DevOps virtual machine, Just ensure that .NET Core 3 tools are installed on the DevOps virtual machines by adding the following YAML instructions to your azure-pipelines.yml file before the build task occurs:
steps:
# Use dotnet 3.x
- task: UseDotNet@2
  displayName: 'Use dotnet sdk 3.x'
  inputs:
    version: 3.x
    includePreviewVersions: false
The task UseDotNet@2 will install latest stable release of .NET Core 3 CLI tools.
Now add the azure-pipelines.yml to GitHub repository:
git add azure-pipelines.yml
git commit -m "DevOps configuration"
git push origin master
Once that we have setup our build pipeline, we are ready to link the GitHub repository to DevOps. Login into your DevOps account and create a new project named WpfLicense. Click project setting and select GitHub connection to connect your DevOps project to the GitHub WpfLicense repository.
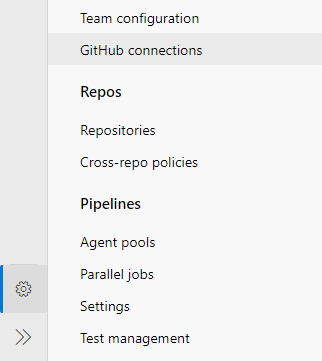
After few click you will have your GitHub repository connected to DevOps.

Now go to the Pipeline tab and press Create pipeline button. You will be prompted to select the repository for your pipeline. Select GitHub. Choose the WpfLicense repository. DevOps will find your YAML code and prompt to review your build script.
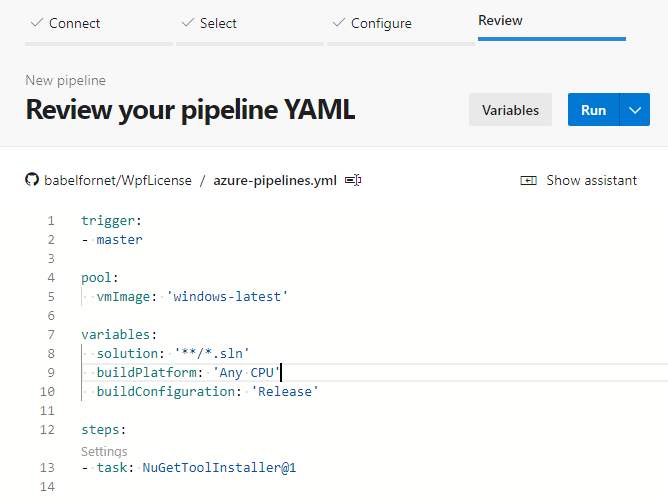
Press RUN to run the build. The build will start and if everything is setup correctly you will get the build succeeded email.
Add Babel Obfuscator to DevOps Build
Now that the DevOps build is up and running let’s add obfuscation to our WpfLicense project. First, you need to upload the Babel.Obfuscator NuGet package to the DevOps Artifacts. The DevOps Artifacts are deployable components in your application. In this case, we will create a NuGet feed to host the Babel.Obfuscator components.
NOTE that the Babel.Obfuscator NuGet package must be hosted on your private feed and not exposed to any public available NuGet package repository.
Go to DevOps Artifacts and Create a feed named Babel. Then press Connect to feed button to show a list of package management tools. If you choose NuGet you will get the instructions to upload your package and configure the feed inside Visual Studio:
Upload to the Babel feed just created the latest version of Babel Obfuscator NuGet package you received with your Company license.
nuget.exe push -Source "Babel" -ApiKey az Babel.Obfuscator.9.4.0.0.nupkg
Inside Visual Studio configure the new Babel package source. Copy the Babel feed URL provided and from the Visual Studio Options panel search for NuGet. Select Package Source and add a new package source named Babel pointing to the DevOps feed URL.
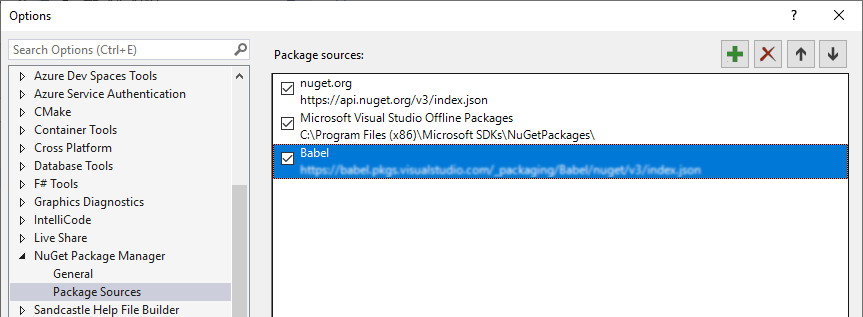
Now that the Babel feed is configured, you can install the Babel Obfuscator package in the WpfLicense project.
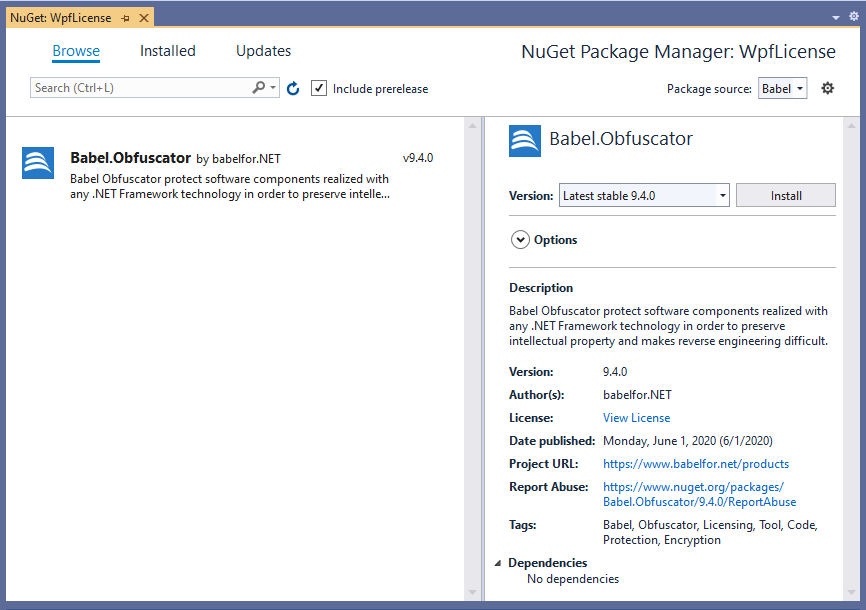
After installing the package rebuild the solution. You will get the following output:

The build failed because Babel Obfuscator needs to find the license file. The babel.license file can be installed in different ways. The most straightforward way to install the license is to put the babel.licenses file inside the solution folder. Add the license file to the solution so that it will be added to the GitHub repository and downloaded to DevOps.
NOTE: If your GitHub repository is public you will expose your license file to everyone. Make your GitHub private to keep your license file safe.
Rebuild the project and now the target executable will be obfuscated and saved in the output folder.
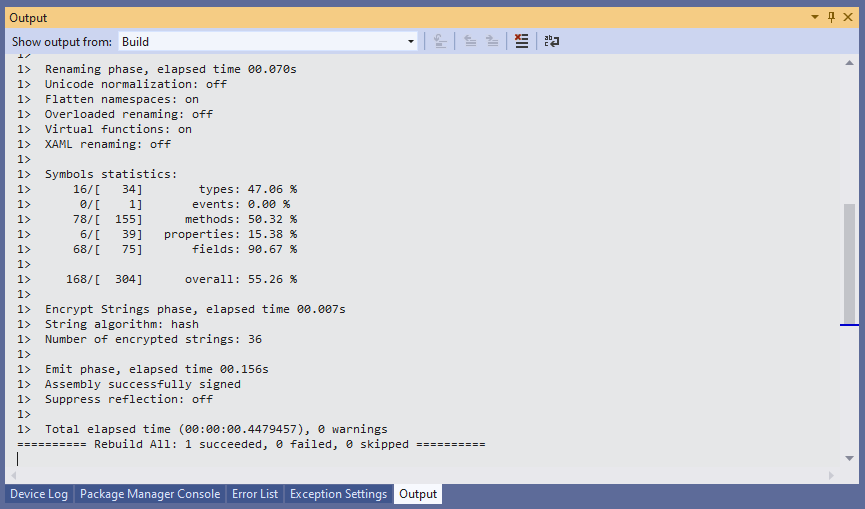
Before committing everything to GitHub and run another DevOps build, we have to modify the YAML script to let DevOps find the Babel Obfuscator NuGet package in the Artifacts.
Change the task NuGetCommand@2 as follow:
- task: NuGetCommand@2
  inputs:
    restoreSolution: '$(solution)'
    feedsToUse: 'select'
    includeNuGetOrg: true
    vstsFeed: Babel
Note we added the vstsFeed property set to the feed name Babel. Commit the changes to GitHub and check out the new build pipeline on DevOps.
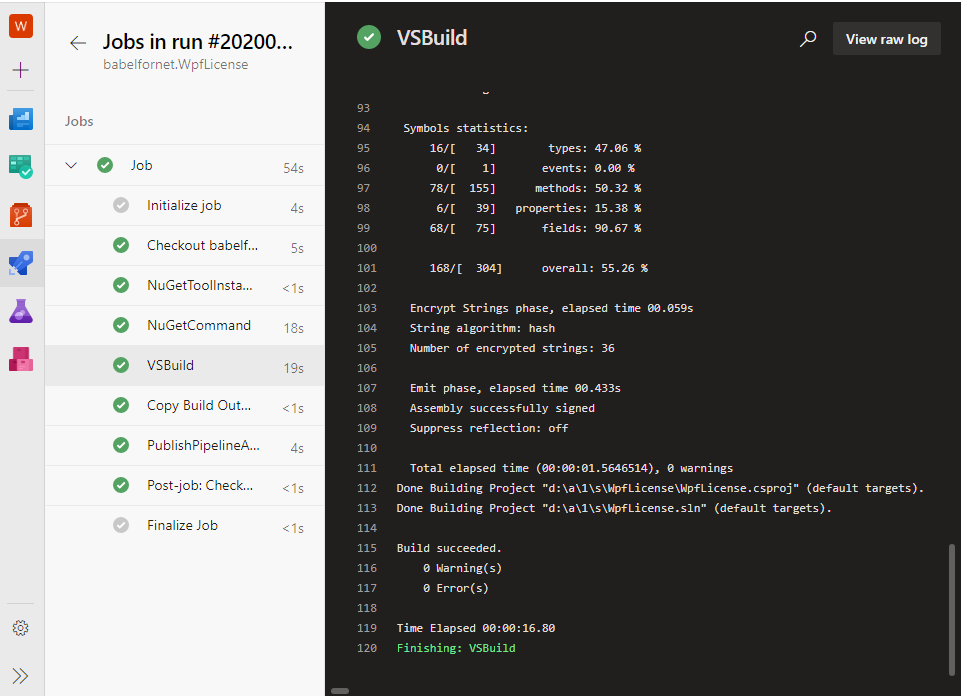
DevOps build will install the Babel Obfuscator NuGet package from the private feed and perform the obfuscation just as it does on the local machine.
All that is left is to configure Babel. The Babel task properties can be overridden inside your Visual Studio project file. For instance, if we want to run the obfuscation only in the Release build disabling Babel in the Debug configuration, just change your project Debug properties as follow:
  <PropertyGroup Condition=" '$(Configuration)|$(Platform)' == 'Debug|AnyCPU' ">
    <BabelEnabled>false</BabelEnabled>
    <PlatformTarget>AnyCPU</PlatformTarget>
    <DebugSymbols>true</DebugSymbols>
    <DebugType>full</DebugType>
It is also possible to change other obfuscation settings like controlling control flow obfuscation settings:
  <PropertyGroup Condition=" '$(Configuration)|$(Platform)' == 'Release|AnyCPU' ">
    <ControlFlowObfuscation>goto=on;if=on;switch=on;case=on;call=on</ControlFlowObfuscation>
    <PlatformTarget>AnyCPU</PlatformTarget>
    <DebugType>pdbonly</DebugType>
The complete list of overridable Babel task properties is available in the Babel Obfuscator user’s guide. You can also add an XML file of obfuscation rules to your project in case you need to set some obfuscation features. Add to the WpfLicense project an XML file named babelRules.xml and set the Build Action to None. Then copy the following XML fragment inside the file.
<?xml version="1.0" encoding="utf-8" ?>
<Rules>
  <Rule name="reduce control flow" feature="control flow" exclude="false" applyToMembers="true">
    <Target>Classes,Structures</Target>
    <Pattern>*</Pattern>
    <Properties>
      <MaxSwitchTargets>5</MaxSwitchTargets>
      <MinInstructionCount>18</MinInstructionCount>
      <UseValueEncryption>false</UseValueEncryption>
    </Properties>
    <Description>Do not scramble methods with few instructions.</Description>
  </Rule>
</Rules>
This rule will prevent the control flow obfuscation of those methods with few IL instructions scrambling only methods containing at least 18 IL instructions.
In this article, we have seen how to build a project hosted on GitHub and DevOps with the integration of Babel Obfuscator. Plug Babel Obfuscator in your DevOps build is just easy as adding a NuGet package to the project. We have used a private feed hosted on DevOps to access the Babel Obfuscator NuGet package, but you can also use other private NuGet repositories like MyGet. This approach will allow you to configure the build and obfuscation locally, and when everything is ready, just commit the changes to GitHub to run the build with Babel on DevOps.
If you have specific questions about this topic, please do not hesitate to write to us.
